Telephone Numbers
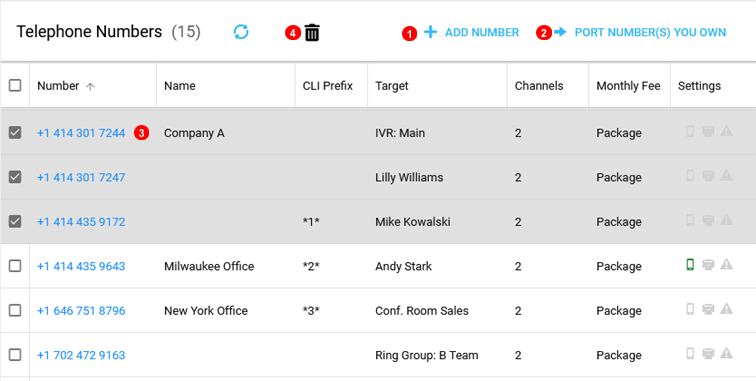
Figure 25.1 Telephone Numbers panel.
Inbound numbers allow to make calls from traditional telephone network to your hosted VoIP systems.
We can assign telephone numbers from more than 4000 cities around the world.
- Click
Add Inbound numberto provision a new telephone number. Numbers are instantly ready to use. - Click
Port Number(s) You Ownto being the porting process and transfer existing number/s you currently have hosted with a different provider. - Click on the Number in blue to edit and change parameters and target.
- When numbers are selected the Delete Icon will appear to remove numbers in bulk.
It is also possible to port (transfer) number(s) from your current provider to GoTrunk. Please open Support Ticket and include:
- List of numbers you wish to port.
- Recent invoice from your current provider.
Add Numbers
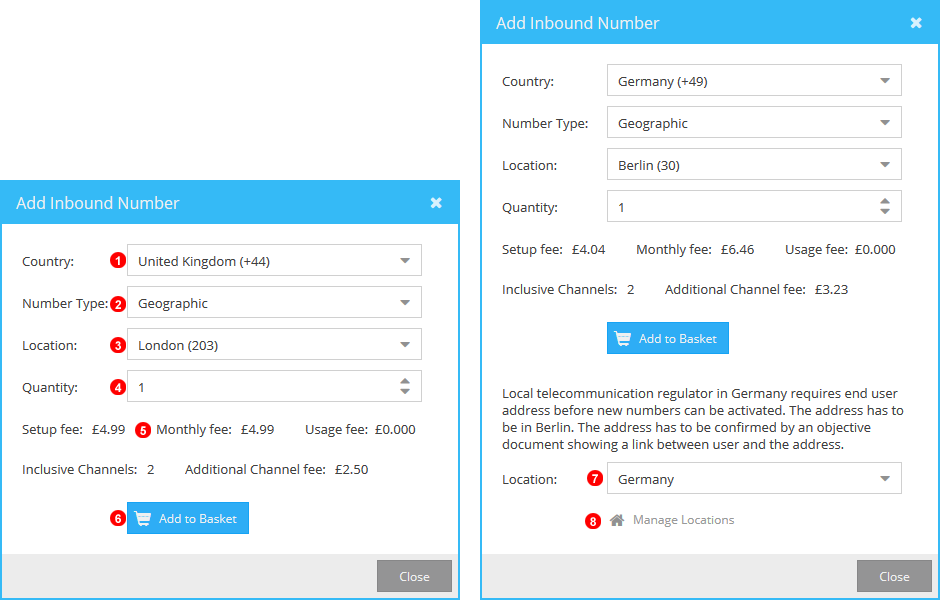
Figure 25.2 Add Numbers Menu
- Select Country.
- Select number Type.
- Select City or State.
- Select Quantity of numbers.
- Will Provide a summary of purchase.
- Click to add to basket and complete procurement of numbers.
- Select Location to connect with number.
- Click to add new location if required for number.
Note: Under some scenarios DDI can not be provisioned immediately and will be marked as pending while our support team processes them. The DDI will be displayed as pending as shown on the screenshot below.
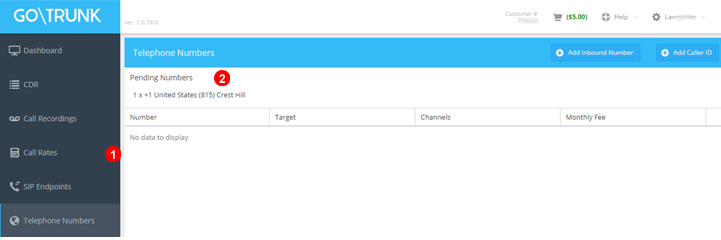
Figure %IMG_ADMIN_DDI_ADD_pending% Pending DDI Warning.
Edit Number
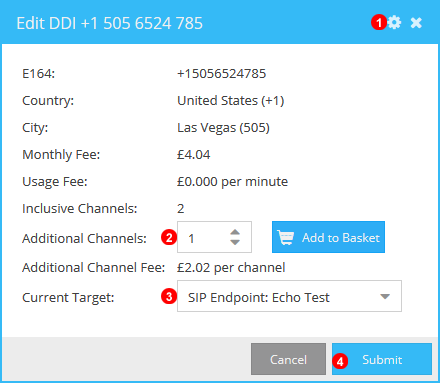
Figure 25.3 Edit Number Menu
- Click the gear to cancel number subscription.
- Increase Incoming channels additional monthly charge will display then click add to basket and checkout to complete.
- Click drop down list to change the target of the number.
- Click update to save any changes.
## Port Number(s) You Own
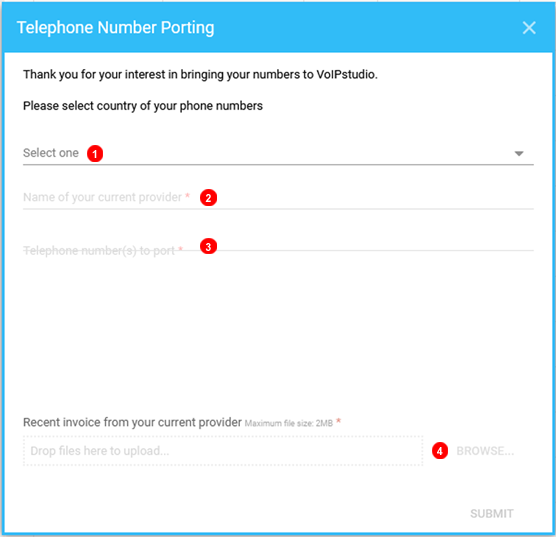
Figure 25.4 Telephone Number Porting window.
- Select number/s' country of origin.
- Enter the name of the current provider.
- Enter the telephone number/s to port in.
- Submit a recent invoice from the current provider. Note: Invoice must be dated from within the last 3 months.