IP PBX Configuration - sipXecs
sipXecs is open software platform for Unified Communications focusing on voice. SIP Trunk configuration instructions below apply to the following sipXecs versions:
- sipXecs Canary, Update 1
SIP Trunk
-
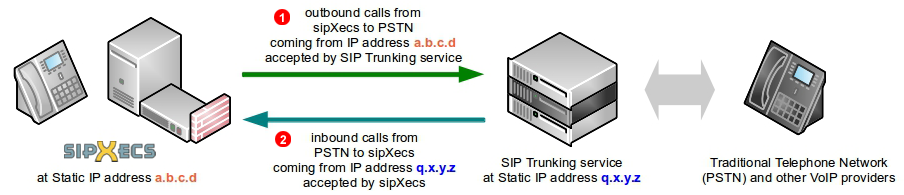
Static IP address (
a.b.c.din our example above) of your sipXecs server will be added to GoTrunk service IP ACL (Access Control List) and outbound calls coming from that IP address will be accepted without requiring any further authentication (SIP username and password). This is the most efficient way of authenticating SIP calls. -
Inbound calls to one of Telephone Numbers on your GoTrunk account will be sent directly to sipXecs public IP address. Since the calls will be coming from known
peer(IP address of SIP Trunking serviceq.x.y.zin our example above) sipXecs will accept them without requiring any further authentication.
To configure sipXecs server to work with GoTrunk SIP trunk using IP authentication the following changes are required:
Follow steps below to add SIP Trunk:
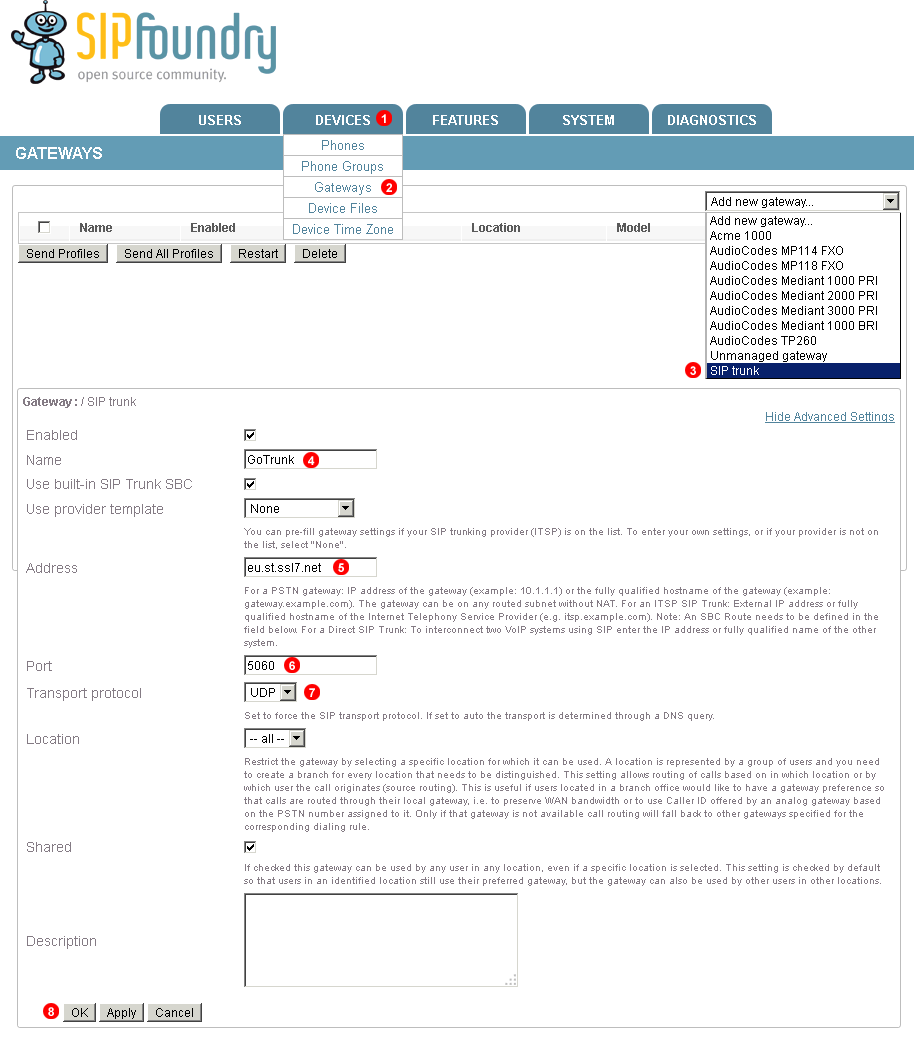
- Click
Devicesmenu. - Select
Gateways. - Click
Add new gateway...->SIP Trunkfrom the menu. - Enter name of the trunk as
GoTrunk - Enter
eu.st.ssl7.netas Address (replace withamn.st.ssl7.netif you want to use North America POP). - Enter
5060as Port number. - Select
UDPas Transfer Protocol. - Click
OKbutton.
Dialplan
Follow steps below to configure Dialplan:
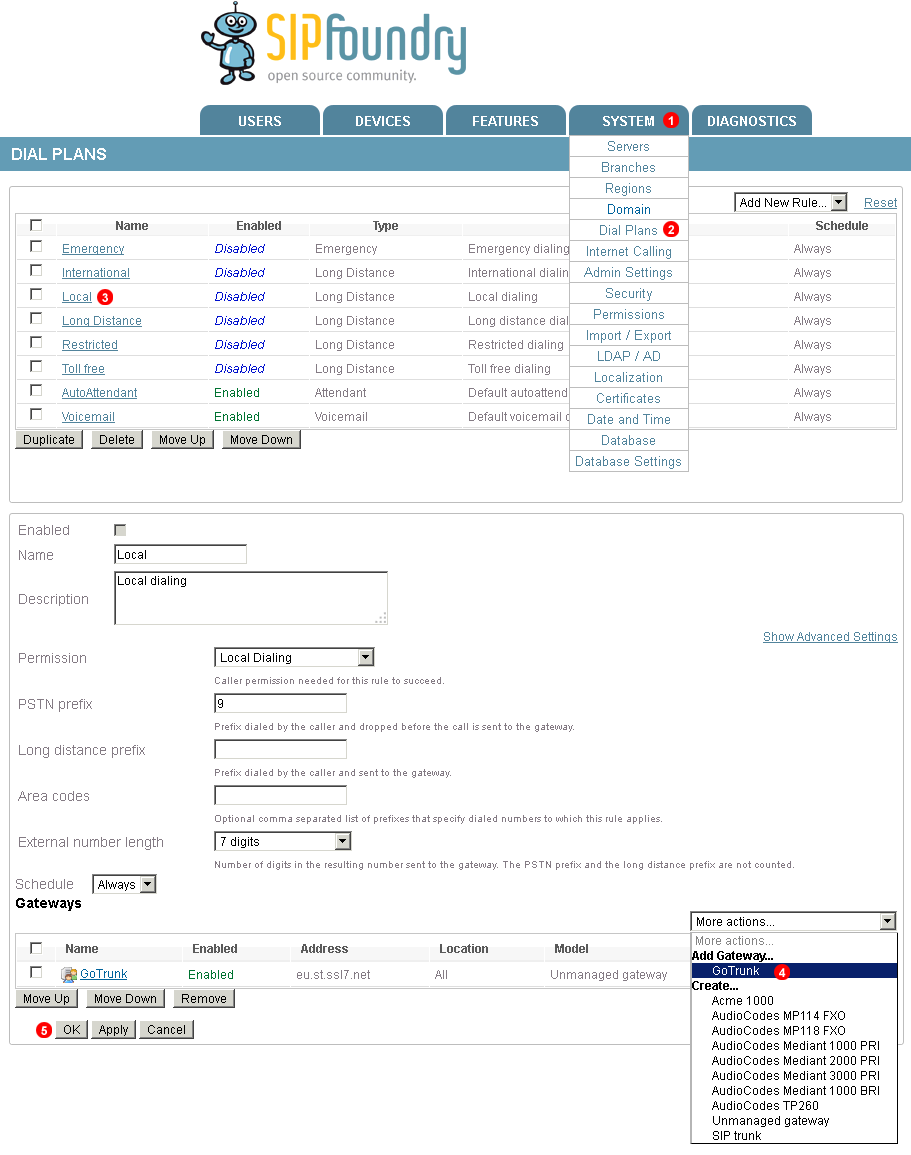
- Click
Systemmenu. - Select
Dial Plans. - Click
Locallink. - Select
GoTrunkfrom the menu. - Clock
OKbutton.