Quick Start
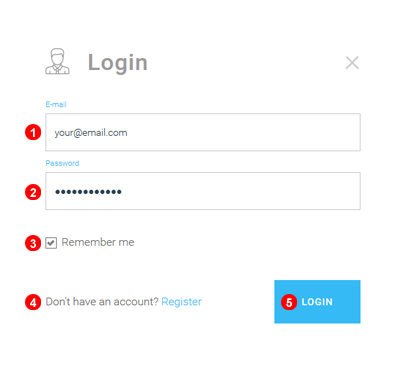
Figure 2.1 GoTrunk Login form.
To login into the control panel navigate your web browser to https://gotrunk.com/login/ and enter your email address into field (1) and password into filed (2). Optionally you can select "Remember me on this computer" checkbox (3) to have your email address saved. If you do not have an account yet just click register for a free 30 day trial (4). Finally click Login button (5).
Setup Wizard
The Setup Wizard will assist with the quick and easy setup of new accounts and trunks.
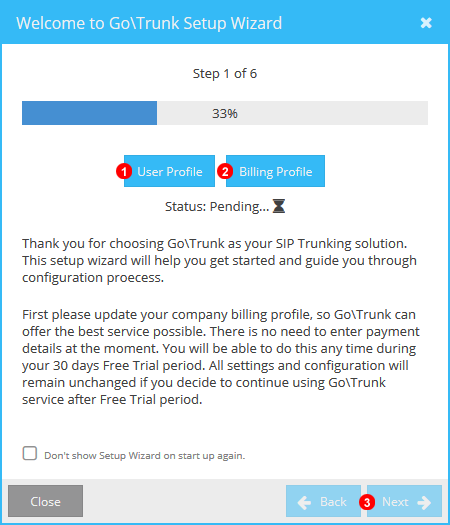
Figure 2.2 Setup Wizard Step 1
- Update user profile and login credentials.
- Update Billing Details used for invoicing.
- Click Next to Proceed to next step.

Figure 2.3 Setup Wizard Step 2
- Update location details used for Emergency services and purchase of numbers requiring location.
- Click Next to Proceed to next step.
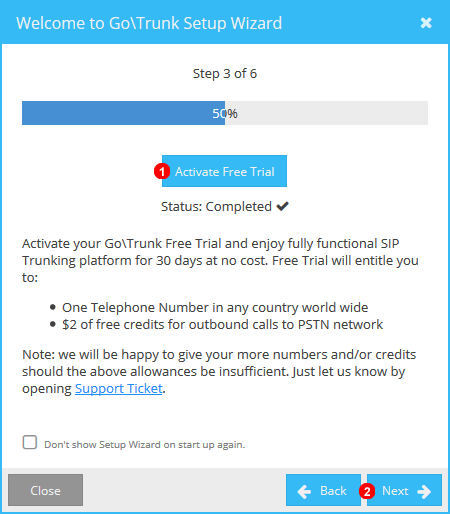
Figure 2.4 Setup Wizard Step 3
- Click to enter number used for activating trial and receive testing credit.
- Click Next to Proceed to next step.
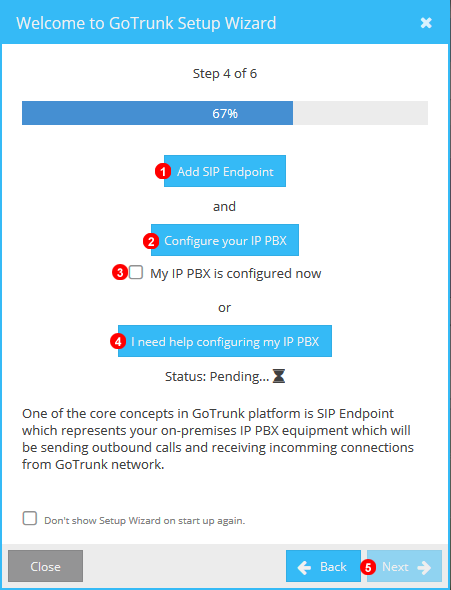
Figure 2.5 Setup Wizard Step 4
- Click to add a SIP Endpoint that will connect to a PBX.
- Click to Display manual on configuring a PBX
- Once configuration have been completed tick the box to confirm.
- If assistance is required please click here to connect with our support team.
- Click Next to Proceed to next step.

Figure 2.6 Setup Wizard Step 5
- Click to select and add an Inbound number for use with GoTrunk.
- If only outbound calling is required select box.
- Click Next to Proceed to next step.
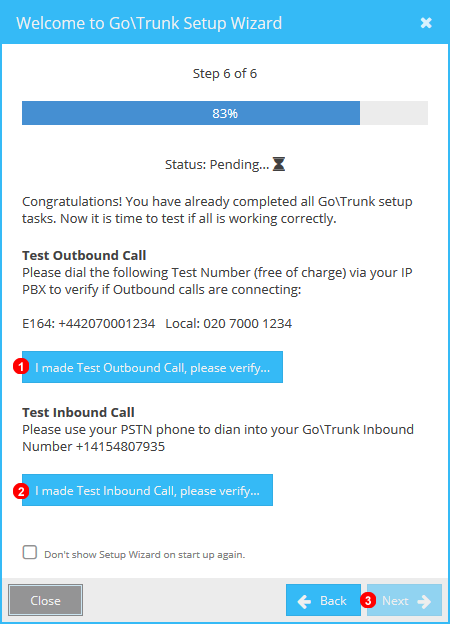
Figure 2.7 Setup Wizard Step 6
- Make a outgoing call from PBX then click to have the system verify the call completed.
- Make a call to an Inbound number on GoTrunk then click to have the system verify the call completed.
- Click Next to Complete the setup.