IP PBX Configuration - FusionPBX
FusionPBX is a web based user interface designed to simplify management of freeSwitch. SIP Trunk configuration instructions below apply to the following FusionPBX versions:
- FusionPBX v. 4.5 - Switch Version 1.8
Documentation is provided for scenario where FusionPBX server uses Static IP address on the public Internet and when Dynamic IP address is used.
Static IP address

-
Static IP address (
a.b.c.din our example above) of your FusionPBX server will be added to GoTrunk service IP ACL (Access Control List) and outbound calls coming from that IP address will be accepted without requiring any further authentication (SIP username and password). This is the most efficient way of authenticating SIP calls. -
Inbound calls to one of Telephone Numbers on your GoTrunk account will be sent directly to FusionPBX public IP address. Since the calls will be coming from known
peer(IP address of SIP Trunking serviceq.x.y.zin our example above) FusionPBX will accept them without requiring any further authentication.
To configure FusionPBX server to work with GoTrunk SIP trunk using IP authentication the following changes are required:
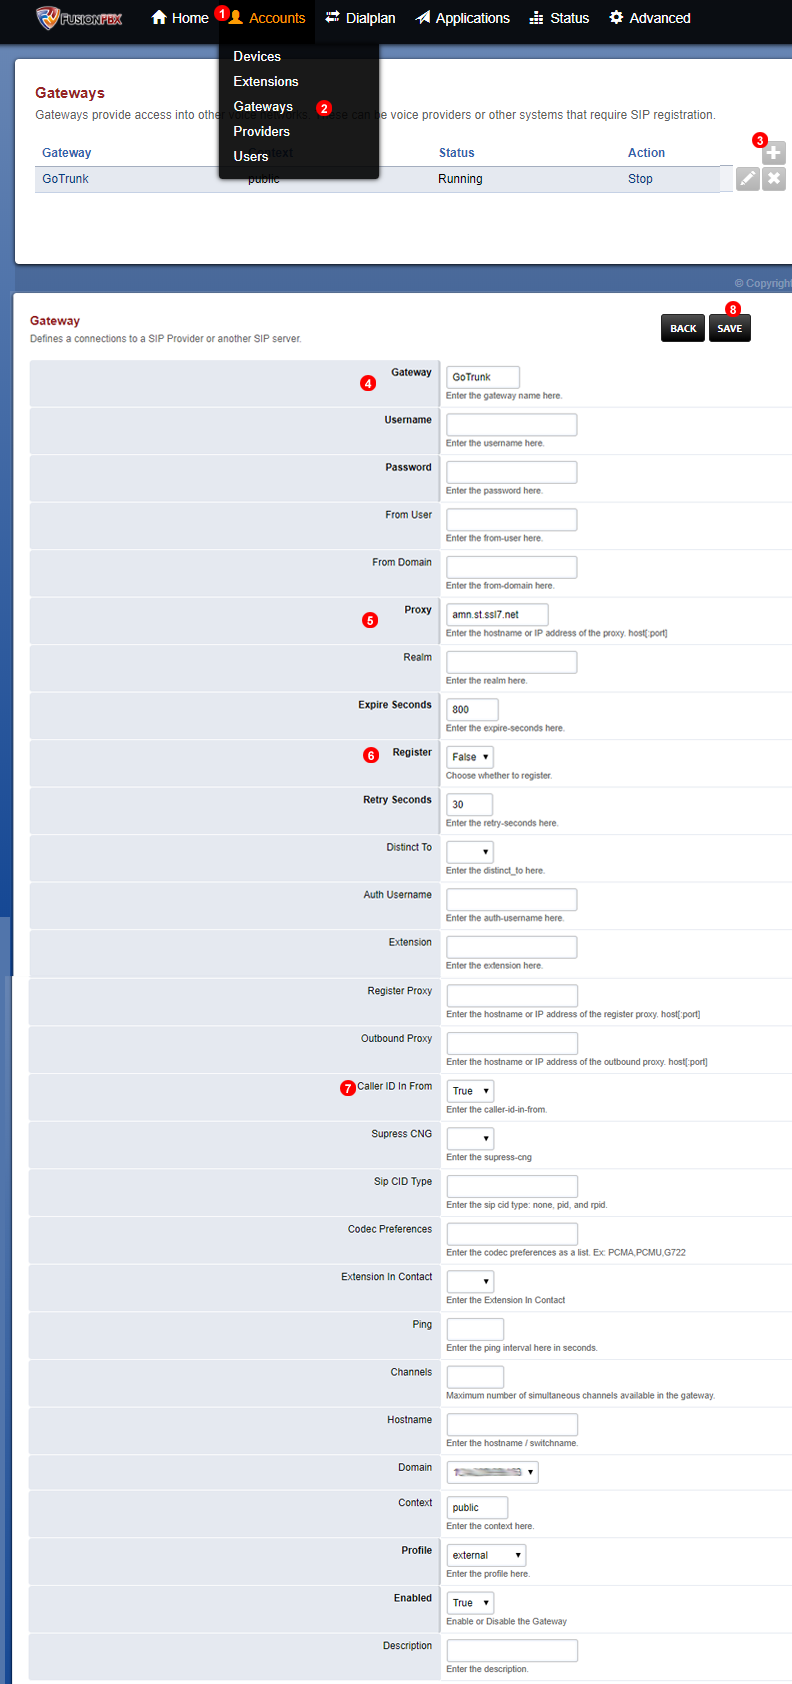
Follow steps below to add SIP Trunk:
- Click
Accountsmenu. - Select
Gateways. - Click
Addbutton - Plus symbol. - Enter name of the trunk as
gotrunk - Enter the following into
Proxyfield (replaceamn.st.ssl7.netwitheu.st.ssl7.netif you want to use North America POP): - Switch
Registerto false. - Set
Caller ID in Fromto True - Click
Savebutton.
Next follow "Routing configuration" instructions below.
Dynamic IP address

-
For outbound calls from FusionPBX to GoTrunk SIP Credentials (SIP username and password) authentication is used.
-
For inbound calls to one of Telephone Numbers on your GoTrunk account to work FusionPBX needs to Register with GoTrunk service (and periodically refresh registration in case IP address changes). Calls will be sent to IP address which was sent in the most recent FusionPBX Registration. Since the calls will be coming from known peer (IP address of SIP Trunking service
q.x.y.zin our example above) FusionPBX will accept them without requiring any further authentication.
To configure FusionPBX server to work with GoTrunk SIP Trunk using SIP Credentials authentication the following changes are required:
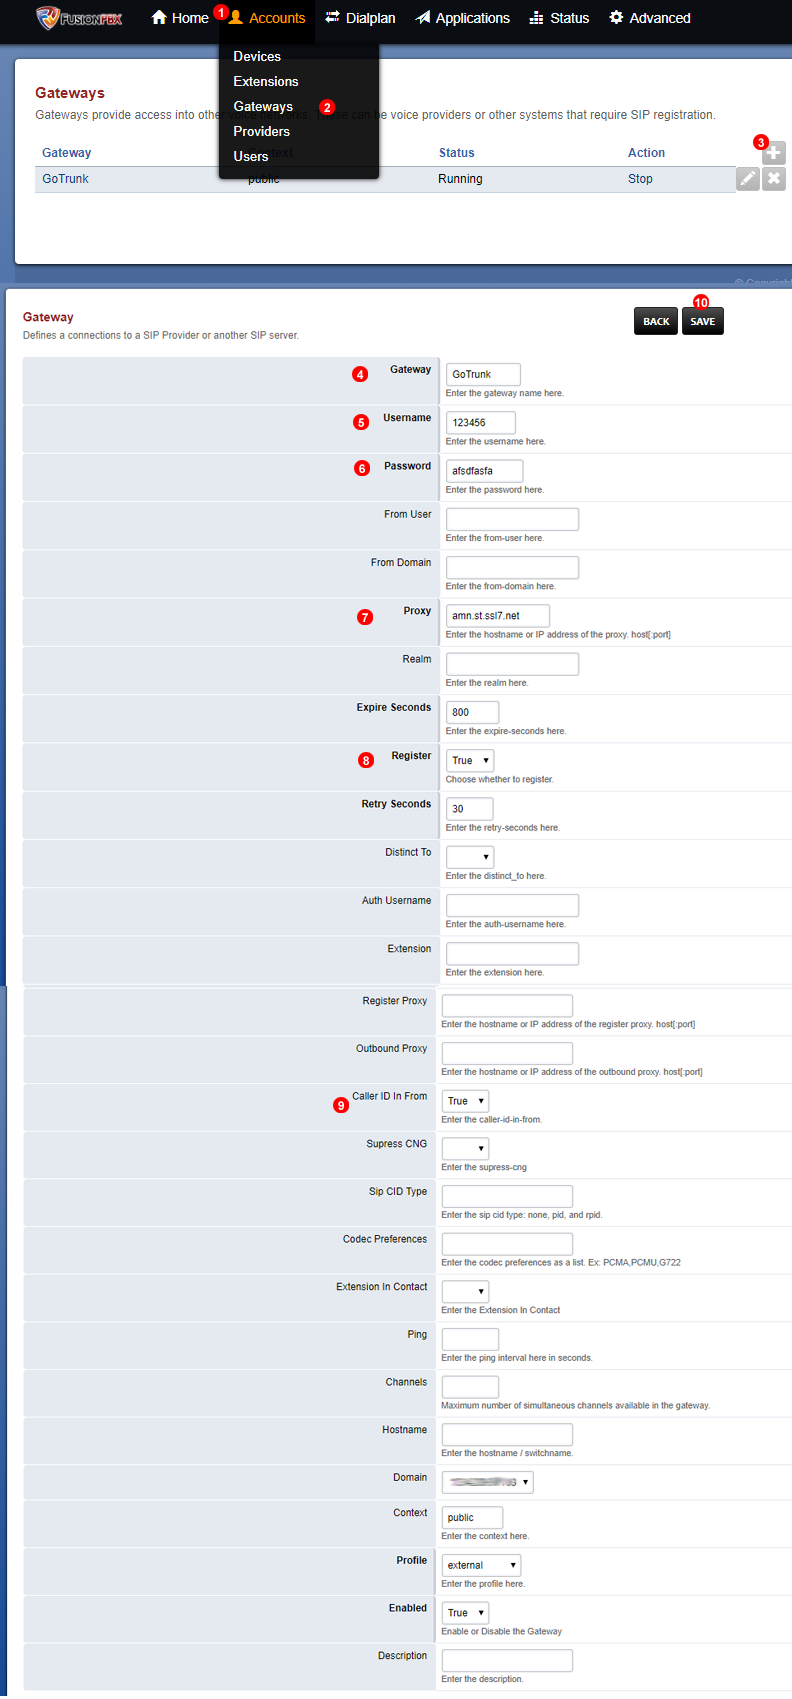
Follow steps below to add SIP Trunk:
- Click
Accountsmenu. - Select
Gateways. - Click
Addbutton - Plus symbol. - Enter name of the trunk as
gotrunk - Under Username field introduce your SIP Username
- Under Password field introduce your SIP Password
- Enter the following into
Proxyfield (replaceamn.st.ssl7.netwitheu.st.ssl7.netif you want to use North America POP): - Switch
Registerto false. - Set
Caller ID in Fromto True - Click
Savebutton.
Next follow "Routing configuration" instructions below.
Routing configuration
Outbound route
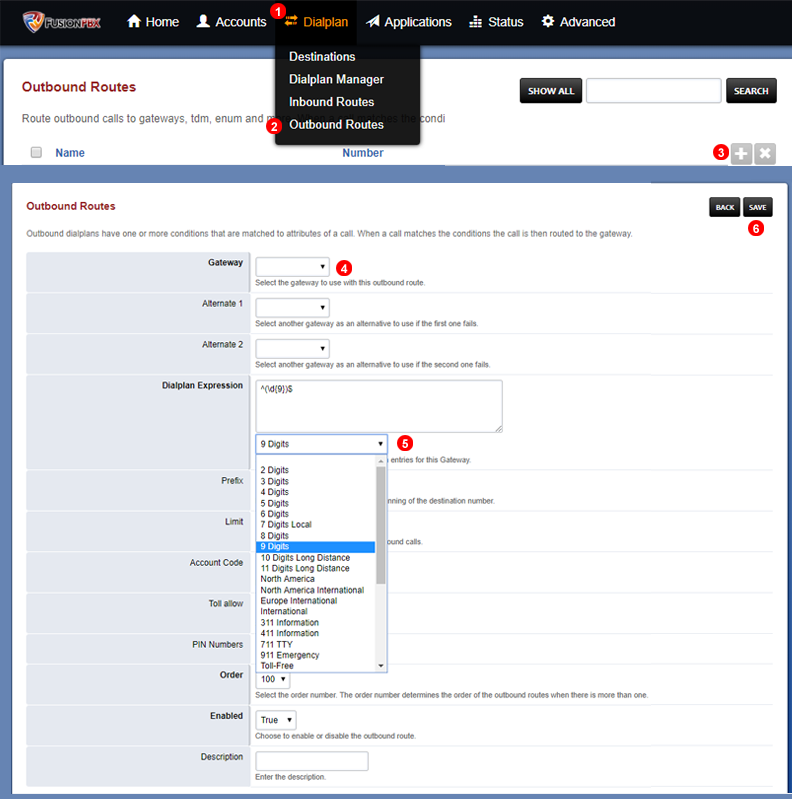
Follow steps below to add Outbound route:
- Click
Dialplan. - Select
Outbound Routes. - Click
Add Outbound Routebutton. - Select Gotrunk from
Gatewaylist. - Add Dialplan Expression or select from dropdown list
- Click
Savebutton.
Inbound routes
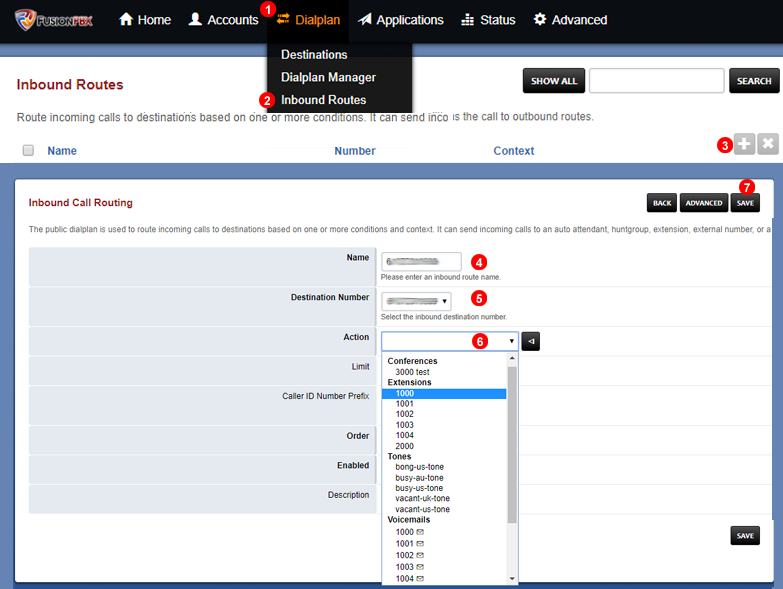
For each of the Telephone Numbers on your GoTrunk account follow steps below to add Inbound route:
- Click
Dialplan. - Select
Inbound Routes. - Click
Add Inbound Routebutton. - Enter Telephone Number into
Namefield. - Enter Telephone Number into
Destination Numberfield. - Set desired destination from
Actionthe drop down list. - Click
Savebutton.
Note: make sure to click Apply Config button in top right corner of the page to reload your FusionPBX configuration.
Set Extension Caller ID
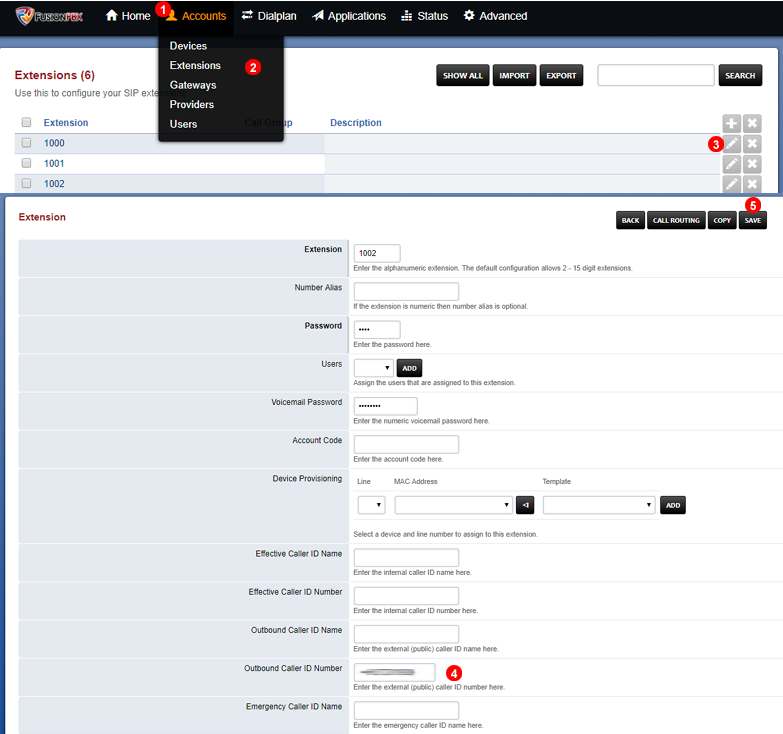
Follow steps below to set Caller ID for each extension:
- Click
Accounts. - Select
Extensions. - Edit extension you like to set CID.
- Enter Caller ID Number into
Outbound Caller ID Numberfield. - Click
Savebutton.
Configuration note
Some FusionPBX has default SIP External listening port as 5080 instead of the standard SIP port.
To make incoming calls work we need to modify SIP port under FusionPBX to 5060. This can be done from Advanced > Variables, under SIP Profile: External, you will need to set external_sip_port to 5060.
If you deployed IP Authentication you have one other option. You can also set remote SIP port to 5080 under GoTrunk. This can be done by editing Endpoint SIP under GoTrunk settings and set port to 5160.
Configuration note
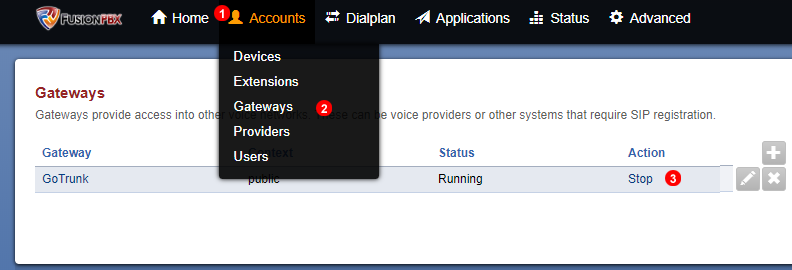
When editing FusionPBX gateway it is needed to restart gateway. Follow the steps bellow to Stop and Start gateway:
- Click
Accountsmenu. - Select
Gateways. - Under corresponding gateway click
Stopbutton. Once stopped clickStartlink.
Configuration note
With FusionPBX has Access control Lists to secure the server. Please while you are testing the trunk configuration make sure default option is Allow.