Dashboard
Provides an Summary of all activity on account and the top up of credit for outgoing calls.
NOTE: Demo Data will display on Graphs until 7 days of Data has been accumulated.
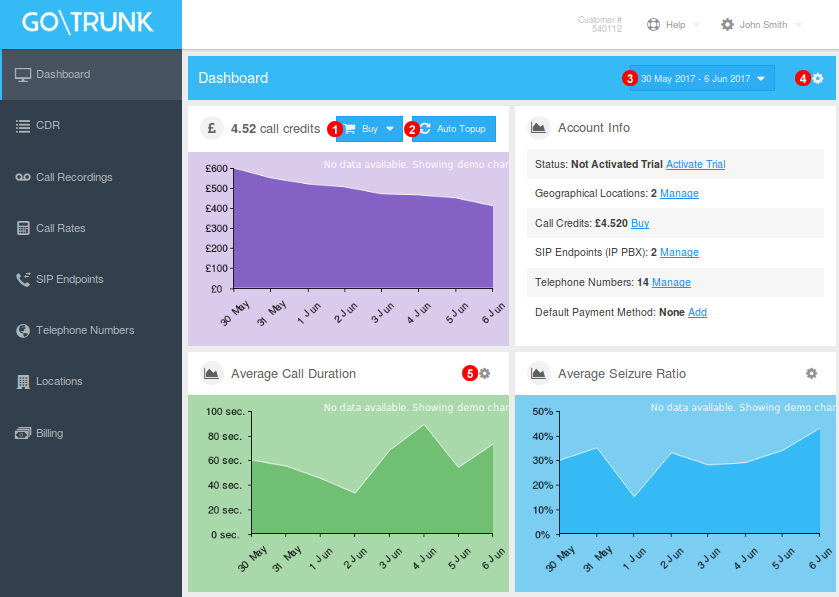
Figure 3.1 Dashboard Menu
- Click to Purchase additional Credit for Calls any selections made will be placed in basket for checkout.
- Click to open Auto Top Up Options and configure.
- Select Time Interval to display on Graphs.
- To add additional or previously removed Graphs just click and select desired options.
- All Graphs can be removed and later added to Dashboard except for Credit/Payment Panel.
Auto Topup
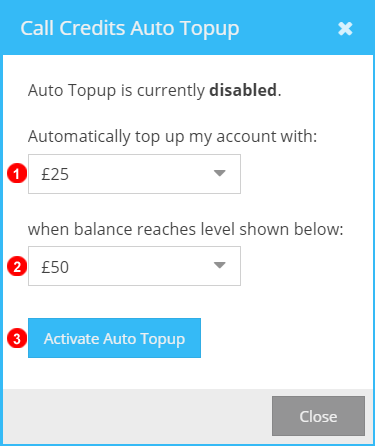
Figure 3.2 Auto Topup Settings.
This feature allows for the automatic purchase of PSTN call credit using any saved payment details.
- Select from drop down Credit Value that system should top up with automatically.
- Select threshold when Auto Topup will automatically add more call credit.
- Click to Enable Auto Topup with selected settings. If already active this will disable Auto Topup feature.
Manual Topup
If Needed PSTN call credit can be added manually.
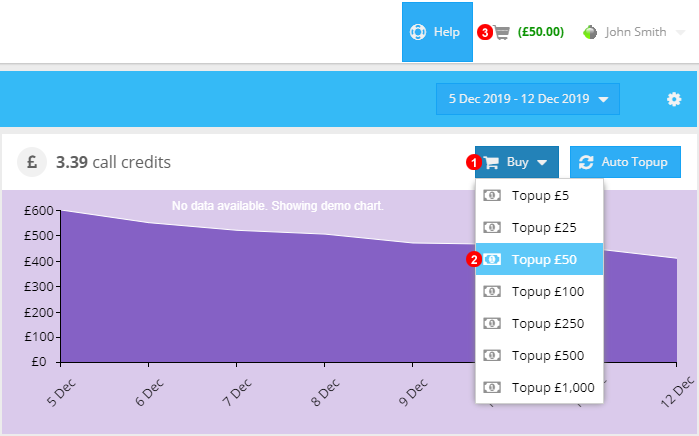
Figure 3.3 Manual Topup Settings.
- Click Buy to Open the Dropdown list of Quick add Values.
- Select the Value to top up with and add it to the Basket.
- Select the Basket to see and Edit Call Credit value before completing purchase.
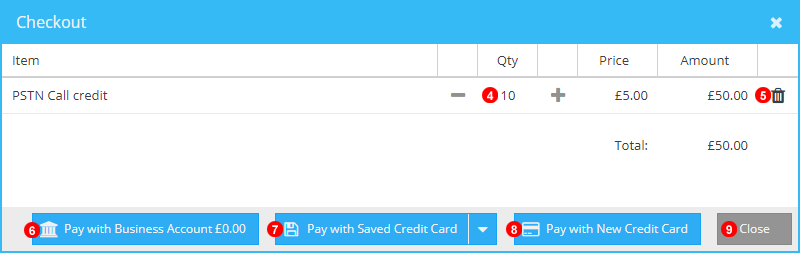
Figure 3.4 Manual Topup Checkout.
- Use +/- to Customize the Credit Value.
- Click the Bin Icon to Remove Items from Selected Row.
- Click to Pay using Funds from Bank Transfer.
- Click to Select one of the Saved Credit cards on the account.
- Click to Enter and used a New or Unsaved credit card.
- Select Cancel to close the basket without making any further changes.