IP PBX Configuration - Issabel
Issabel is an Open Source Unified Communications Software. SIP Trunk configuration instructions below apply to the following Issabel versions:
- Issabel V.4
Documentation is provided for scenario where Issabel server uses Static IP address on the public Internet and when Dynamic IP address is used.
To begin SIP Trunk configuration open PBX Configuration:
Issabel
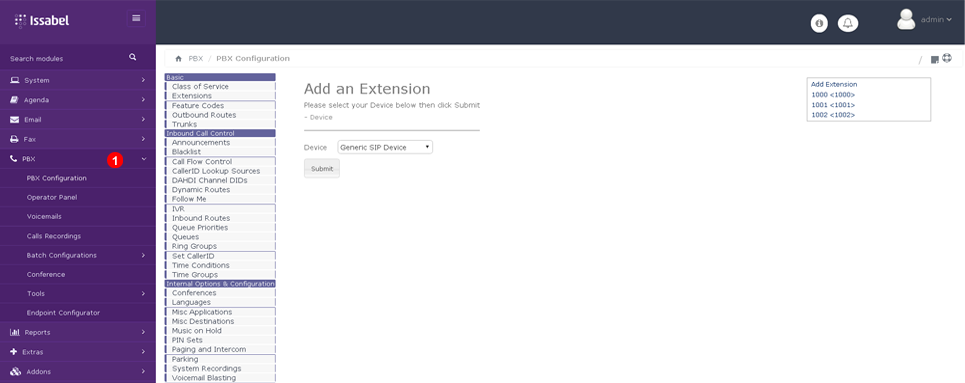
- Click
PBXon left side menu bar.
Next follow "Static IP address" or "Dynamic IP address" section below.
Static IP address
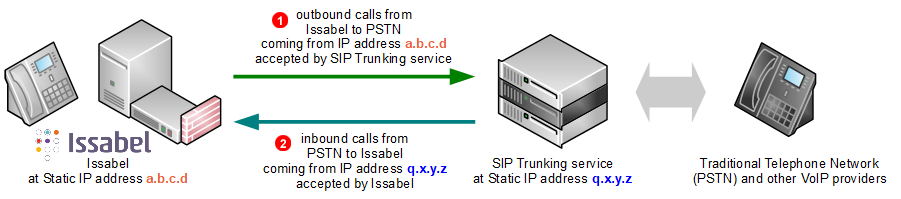
-
Static IP address (
a.b.c.din our example above) of your Issabel server will be added to GoTrunk service IP ACL (Access Control List) and outbound calls coming from that IP address will be accepted without requiring any further authentication (SIP username and password). This is the most efficient way of authenticating SIP calls. -
Inbound calls to one of Telephone Numbers on your GoTrunk account will be sent directly to Issabel public IP address. Since the calls will be coming from known
peer(IP address of SIP Trunking serviceq.x.y.zin our example above) Issabel will accept them without requiring any further authentication.
To configure Issabel server to work with GoTrunk SIP trunk using IP authentication the following changes are required:
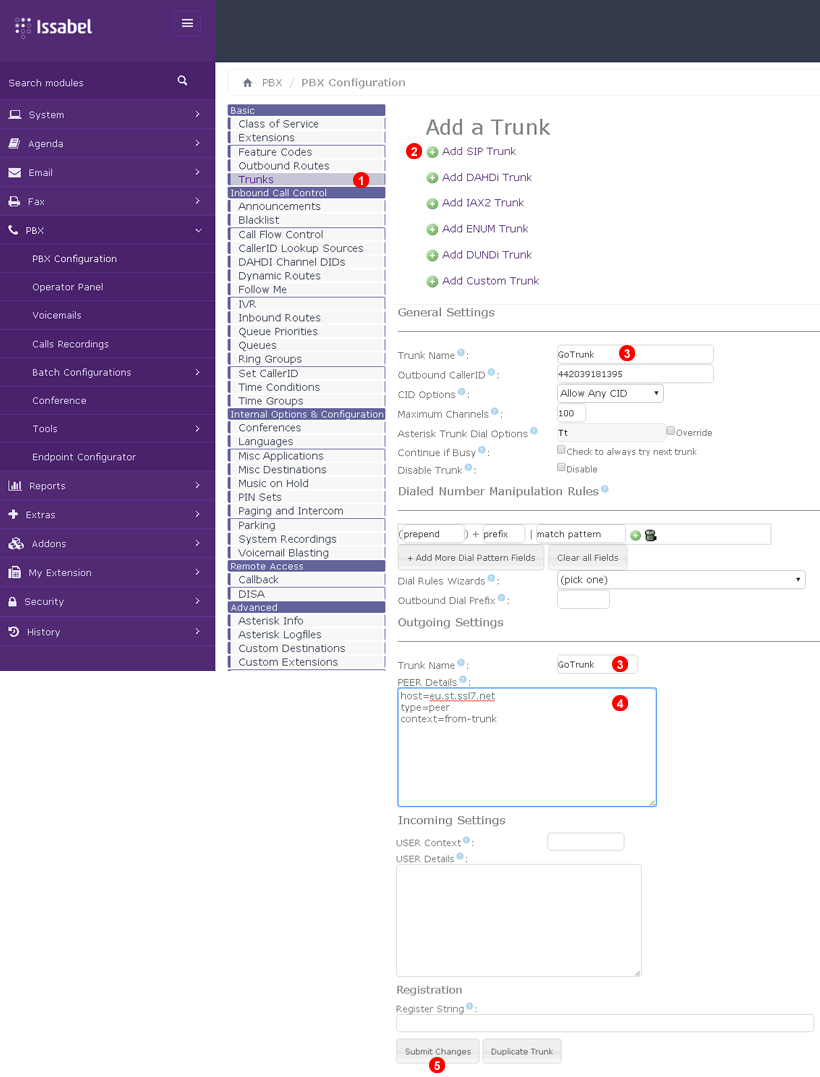
Follow steps below to add SIP Trunk:
- Select
Trunks. - Click
Add SIP Trunkbutton. - Enter name of the trunk as
gotrunk - Enter the following into
PEER Detailsfield (replaceeu.st.ssl7.netwithamn.st.ssl7.netif you want to use North America POP):
type=peer
host=eu.st.ssl7.net
context=from-trunk
- Click
Submit Changesbutton.
Next follow "Routing configuration" instructions below.
Dynamic IP address
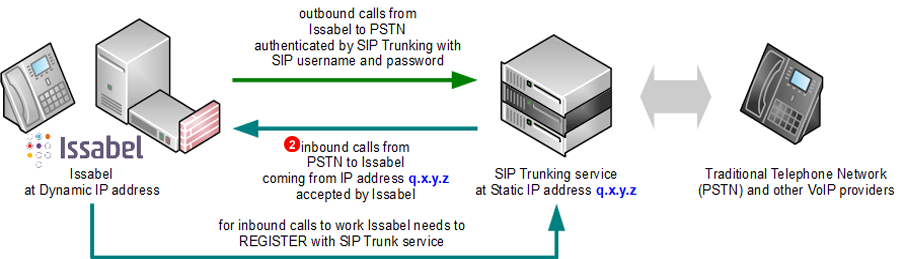
-
For outbound calls from Issabel to GoTrunk SIP Credentials (SIP username and password) authentication is used.
-
For inbound calls to one of Telephone Numbers on your GoTrunk account to work Issabel needs to Register with GoTrunk service (and periodically refresh registration in case IP address changes). Calls will be sent to IP address which was sent in the most recent Issabel Registration. Since the calls will be coming from known peer (IP address of SIP Trunking service
q.x.y.zin our example above) Issabel will accept them without requiring any further authentication.
To configure Issabel server to work with GoTrunk SIP Trunk using SIP Credentials authentication the following changes are required:
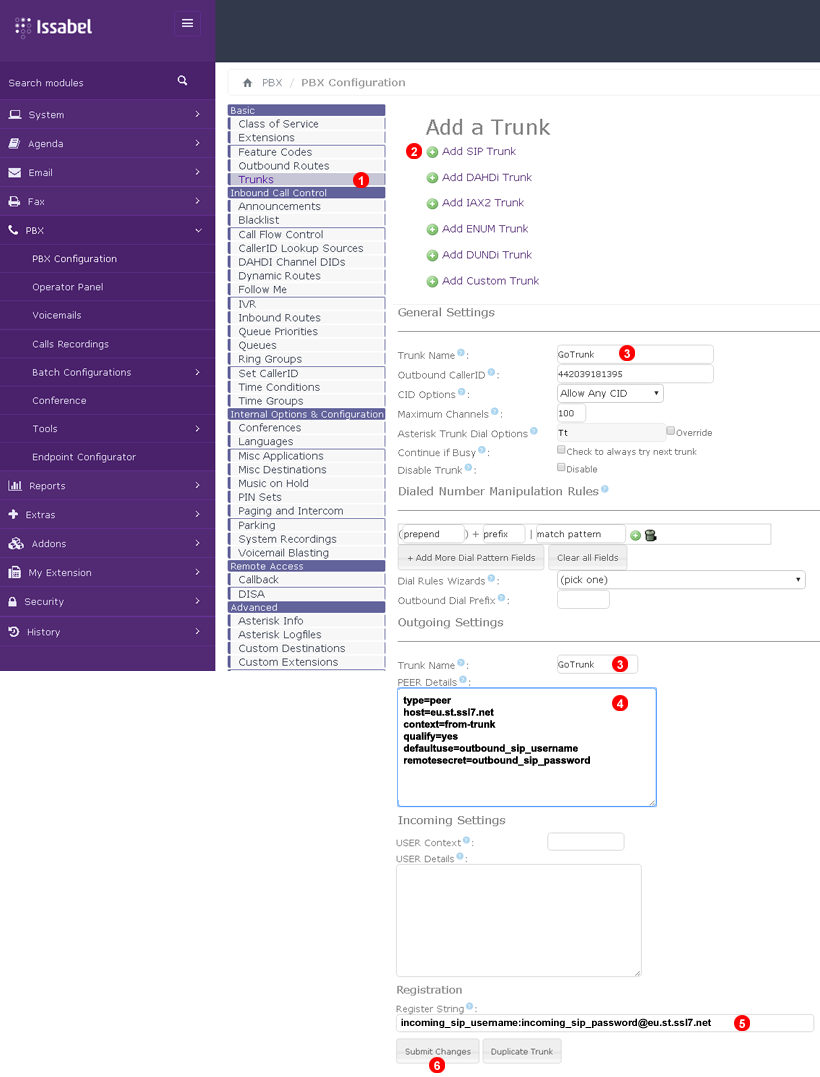
Follow steps below to add SIP Trunk:
- Select
Trunks. - Click
Add SIP Trunklink. - Enter name of the trunk as
gotrunk - Enter the following into
PEER Detailsfield (replaceeu.st.ssl7.netwithamn.st.ssl7.netif you want to use North America POP):
type=peer
host=eu.st.ssl7.net
context=from-trunk
qualify=yes
defaultuser=outbound_sip_username   ; <- replace with your Outbound SIP Username
remotesecret=outbound_sip_password  ; <- replace with your Outbound SIP Password
- Enter the following into
Register String:
incoming_sip_username:incoming_sip_password@eu.st.ssl7.net
- Click
Submitbutton.
Verify SIP Registration
To verify your Issabel server has correctly registered on GoTrunk network follow steps below:
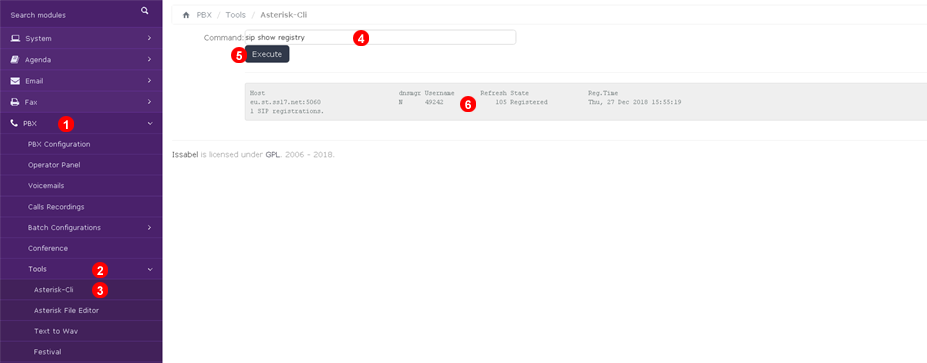
- Click
PBXmenu. - Select
Tools. - Select
Asterisk-Cli. - Type the following command:
sip show registry - Click
Executebutton. - Verify the state is
Registered. Any other state indicates communications problem (firewall / NAT issue) between your Issabel server and GoTrunk network or incorrect Register string in your trunk configuration.
Next follow "Routing configuration" instructions below.
Routing configuration
Outbound route
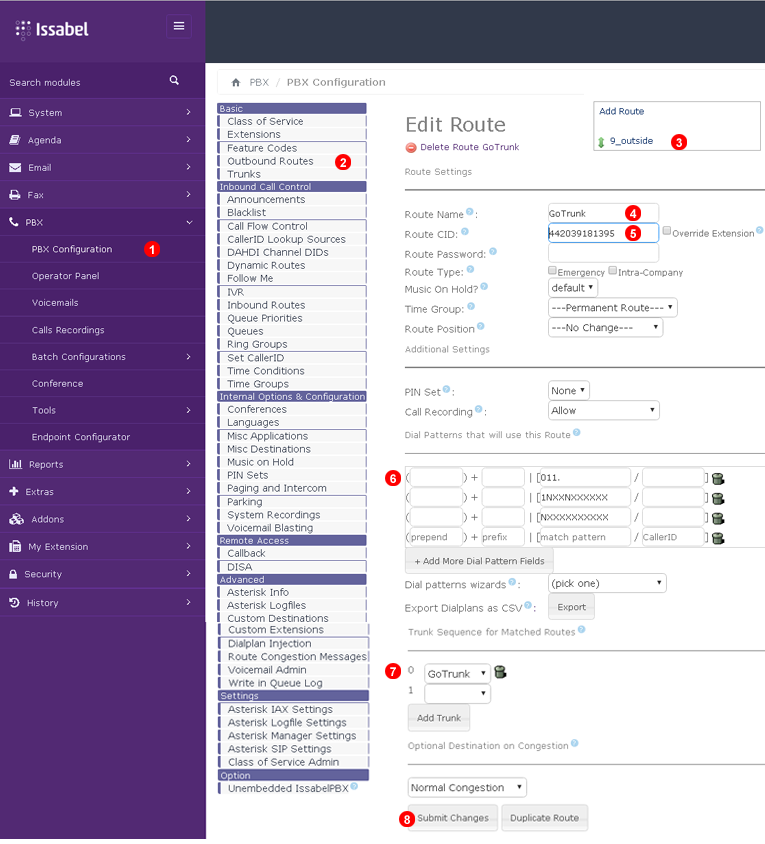
Follow steps below to add Outbound route:
- From
PBX Configuration - Select
Outbound Routes. - Click
9_outsidelink. - Set GoTrunk as
Route Name - Set
Route CID - Edit
Dial Patternsas needed - Select
gotrunkfrom drop down list. - Click
Submit Changesbutton.
Inbound routes
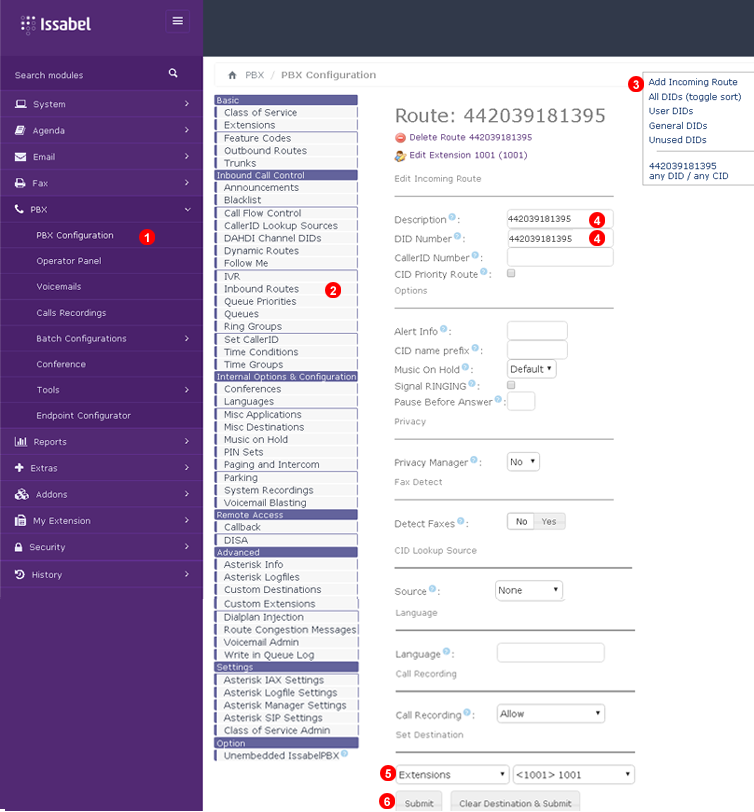
For each of the Telephone Numbers on your GoTrunk account follow steps below to add Inbound route:
- From
PBX Configuration - Select
Inbound Routes. - Click
Add Inbound Routebutton. - Enter Telephone Number into
Descriptionfield and intoDID Numberfield. - Set desired destination from the drop down list.
- Click
Submitbutton.
Note: make sure to click Apply Config button in top right corner of the page to reload your FreePBX configuration.